7 yoga moves for everybody (and any skill level)
Today's blog is a gift to you.
This offering is for you to see yoga as a normal everyday activity.
To understand that yoga is a process that is firstly about increased awareness, to be aware is to be awake, alive and participating in your life. Secondly, yoga will give you more mobility. To be flexible in the mind is to be present and flexible in the body. One cannot happen without the other.
And with awareness and attention, with mindful movement you have the ability to connect to the power available within.
So I've created a short sequence of 7 yoga moves for you.
This very simple sequence that can be done at home on your bed or a mat on the floor hopefully will give you an indication of how yoga can be for everybody and every body.
Have you seen how the ancient art of yoga is presented today in Gyms and fitness centres around the world? Does it makes you feel unable to join in? Are the adverts and images showing attractive young supple (mostly women) of a certain age? Do you decide then that yoga is not for you?
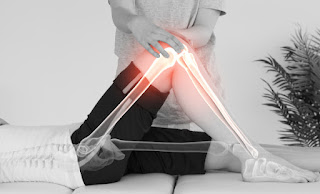
You can’t imagine that with your body, your injuries, your age, your sore back, hip, knee or your arthritis, your spine condition, your aches and pains that you could possibly come to a class.
I see that yoga has become polluted by what I call the glossy magazine syndrome.
This is where you take a normal activity, like walking, biking, swimming or yoga and as soon as an article is written about it, the gloss builds up. Shiny bright things are photographed (and photoshopped) doing said activity. With bright smiles and beautiful bodies.
You start to think that unless you resemble those images, you will not be able to participate.
Better to stay home on the couch.
Here I give you 7 yoga moves so you no longer have to believe that doing yoga means you have to bend and twist and get into shapes that are very hard if not impossible. So just do this simple sequence and discover the power within yoga for yourself.
First move
Get to your mat. Don’t have a mat? No excuse, find a rug or carpet area or bed. Yes you can even do yoga from bed if that works for you. This may seem like a cheat to say the first move is getting to your mat, but actually it is the very, very, very hardest move to do. It’s harder than putting your foot behind your head. I like inspirational speaker Mel Gibson’s five second rule. She says the moment you have an idea, thought, impulse to do something. You have 5 seconds to start it. Otherwise the thoughts, the doubts the worries or the “yes buts” flood into the brain and take you off track.
First move: Go to your mat or area where you do yoga.
Once you are lying down, if you are listening to the recording press play now (sequence is 15 minutes) If you want to do the sequence longer just have the 7 moves printed out.
Second Move
Lie down. That’s right just get on your mat and lie down. If you are in bed you are already lying. That was easy! Nothing to do, nowhere to go. Bring your mind to the practice. You will probably think that doing Yoga needs to be a very physical activity, actually it’s only goot to move physically AFTER you have got your nervous system in order. Once you are in rest and restore mode. And the best way to do that is to lie down and breath. Relax. Tell your body and brain that you have 10 minutes uninterupped time to practice. Or an hour. Or somewhere inbetween. Switch off your phone and just lie there for a couple of minutes doing NOTHING. Beware if you do chose to be in bed you may fall asleep !
Second move: Lie down - this posture is called sivasana
Third Move
Put your feet up. Make sure you are lying down somewhere that has a wall. If you can’t lie down on the floor very easily then just lie on your bed. Bring your hips close enough to the wall that it doesn’t create too much pressure on the lowerback. Some people like their hips close to the wall, some a little further away. Experiment and feel free to change it up. Then as you turn to lie down move your feet up the wall. Simple. Put your head on a pillow or bolster, rest your arms by your side or interlace them under your head. Legs up the wall is the most beneficial way to relax the heart (it gets a break from the normal work it needs to do when moving and having limbs vertical). It helps drain excess fluid from the feet and ankles if they tend to get swollen and some advocates say it’s good for lower back pain, insomnia and even menstrual issues for women.

Third Move: Legs up the wall. Viparita Karani is the Sanskrit name for legs up the wall.
Fourth Move
Arms and shoulders. You should not be surprised if you have shoulder tension. Your neck and shoulder area is where you carry the weight of your world. And most of us, by the time we reach adulthood have become patterned to have stress in that area of the body. Even if you work out, swim, use weights you will discover shoulder tension because that is the one area of the body that holds your stress. The fourth move in this sequence of yoga moves for everybody is staying where you are with your legs up the wall and then extend your arms back behind you to touch the floor or mat or mattress. Straighten your elbows and widen your fingers. If it’s too tight, take your hands out to the sides. If you have a lot of tension or tightness, put a pillow or block behind you so if your hands cannot reach the floor when they are outreached behind, you bring the floor up to reach you, you create a raised platform for the hands to find. And it can be super powerful to let your hands be suspended in the air, but for many people, if you are beginning, that can create more tension rather than help you relieve tension. And remember to get a balance when you touch the tension in your shoulders. You want to oscillate between finding a restriction (reaching out your hands, straitening your arms) and relaxing your shoulders and letting go of that restriction. This posture with your arms straight up and out behind you will show you very clearly where your tension is in the shoulders. So breath and relax around any tension you discover and watch it dissolve. Breath and let it go. If you practice yoga and you get all tight and strain and fight in the posture you are not getting the benefits of the practice. You are moving in the opposite directions from what Yoga is designed for. So remember to relax and wait and see how the body knows how to adjust.

Fourth move: Extend your arms behind you on the floor
Fifth Move
Neck: Once you have your legs up the wall and your arms, elbows and fingers extended out behind you turn your neck to the left for a couple of minutes and then come back to centre and turn your head to the right. This sequence of neck turns is to be done very slowly, mindfully and with care. You may carry some story in your neck, and so you need to allow yourself to feel safe. And in that safety you also want to turn enough to each side (while keeping your arms up behind you) that gives you a clear picture of your neck tension so you can release it. Even if you have a really tight neck (maybe only on one side) you can still find the movement to a millimetre. Don’t be disheartened by a small movement. Each degree is important. In fact some people in the neuroscience and movement field will tell you that a smaller movement is better. That you are in fact training the brain to understand and map the movement range in your neck and the brain needs tiny movements and full awareness and consciousness of those movements to be able to increase them
Fifth move: turn your neck to left and right then come back to centre
Sixth Move
Bring your arms by your side. Feel the circulation normalize. Depending on how long you keep them extended on the floor behind you, you may incur some numbness or loss of feeling in the hands, shoulders or arms. Remember that the posture itself does not create that numbness. It is the restriction in the shoulder that pre-exists that creates the numbness. You are just putting the shoulder in a position that is highlighting that restriction. You have heard of frozen shoulder. Well any tightness or tension in the shoulder is a precursor for having the shoulder freeze, it means stiffness, lightness and lack of circulation. As you place your arms back down by the sides of your body let yourself relax and feel the blood, lymph and other circulatory systems come back to neutral.
Then raise your right foot off the wall towards the right shoulder. Extend the back of the right knee and flex the right foot. Keep your hips and lower back evenly placed on the mat. Centre the heel of the left foot that remains on the wall (making sure the foot is aligned and not turning in or out to the sides). Make a small (very small) movement of the right leg so you turn the femur (thigh bone) in slightly to the left. This movement is tiny and just makes a very small adjustment in the hip socket. Keep the right leg fully extended up towards the ceiling, moving toward the right shoulder, opening up the back of the right knee and flexing the right foot strongly so the toes of the right foot are facing towards your belly or forehead. At the same time see if you can let the leg drop back into the hip socket by using gravity.
After a time (could be 30 seconds, one minute, five minutes or somewhere inbetween) change sides.
Do not be surprised if it feels different on left to right. When you explore these simple yoga moves for everybody you are probably going to find a difference between the left and right sides of your body. It’s normal.
Sixth move: lift each leg off the wall, keep it straight and flex the foot.
Seventh Move:
Now bend your knees to bring your legs off the wall onto your mat. Relax your whole body. With your legs extended out in front of you. Lie and breath and relax.
Seventh Move Final Relaxation.
And when you have finished this sequence, allow yourself to move more slowly and more mindfully as you go through your day and your life.
Click here to get the audio recording
Here’s a summary of the seven moves. If you want to take longer than the 15 minutes recording to do the sequence, you can print this off by clicking here
Summary page of SEVEN MOVES of YOGA FOR EVERYBODY
If you would like more recordings of full yoga classes to join Kathy White Yoga membership go here Kathy White Yoga Membership
This offering is for you to see yoga as a normal everyday activity.
To understand that yoga is a process that is firstly about increased awareness, to be aware is to be awake, alive and participating in your life. Secondly, yoga will give you more mobility. To be flexible in the mind is to be present and flexible in the body. One cannot happen without the other.
And with awareness and attention, with mindful movement you have the ability to connect to the power available within.
So I've created a short sequence of 7 yoga moves for you.
This very simple sequence that can be done at home on your bed or a mat on the floor hopefully will give you an indication of how yoga can be for everybody and every body.
Have you seen how the ancient art of yoga is presented today in Gyms and fitness centres around the world? Does it makes you feel unable to join in? Are the adverts and images showing attractive young supple (mostly women) of a certain age? Do you decide then that yoga is not for you?
You can’t imagine that with your body, your injuries, your age, your sore back, hip, knee or your arthritis, your spine condition, your aches and pains that you could possibly come to a class.
I see that yoga has become polluted by what I call the glossy magazine syndrome.
This is where you take a normal activity, like walking, biking, swimming or yoga and as soon as an article is written about it, the gloss builds up. Shiny bright things are photographed (and photoshopped) doing said activity. With bright smiles and beautiful bodies.
You start to think that unless you resemble those images, you will not be able to participate.
Better to stay home on the couch.
Here I give you 7 yoga moves so you no longer have to believe that doing yoga means you have to bend and twist and get into shapes that are very hard if not impossible. So just do this simple sequence and discover the power within yoga for yourself.
First move
Get to your mat. Don’t have a mat? No excuse, find a rug or carpet area or bed. Yes you can even do yoga from bed if that works for you. This may seem like a cheat to say the first move is getting to your mat, but actually it is the very, very, very hardest move to do. It’s harder than putting your foot behind your head. I like inspirational speaker Mel Gibson’s five second rule. She says the moment you have an idea, thought, impulse to do something. You have 5 seconds to start it. Otherwise the thoughts, the doubts the worries or the “yes buts” flood into the brain and take you off track.
First move: Go to your mat or area where you do yoga.
Once you are lying down, if you are listening to the recording press play now (sequence is 15 minutes) If you want to do the sequence longer just have the 7 moves printed out.
Second Move
Lie down. That’s right just get on your mat and lie down. If you are in bed you are already lying. That was easy! Nothing to do, nowhere to go. Bring your mind to the practice. You will probably think that doing Yoga needs to be a very physical activity, actually it’s only goot to move physically AFTER you have got your nervous system in order. Once you are in rest and restore mode. And the best way to do that is to lie down and breath. Relax. Tell your body and brain that you have 10 minutes uninterupped time to practice. Or an hour. Or somewhere inbetween. Switch off your phone and just lie there for a couple of minutes doing NOTHING. Beware if you do chose to be in bed you may fall asleep !
Second move: Lie down - this posture is called sivasana
Third Move
Put your feet up. Make sure you are lying down somewhere that has a wall. If you can’t lie down on the floor very easily then just lie on your bed. Bring your hips close enough to the wall that it doesn’t create too much pressure on the lowerback. Some people like their hips close to the wall, some a little further away. Experiment and feel free to change it up. Then as you turn to lie down move your feet up the wall. Simple. Put your head on a pillow or bolster, rest your arms by your side or interlace them under your head. Legs up the wall is the most beneficial way to relax the heart (it gets a break from the normal work it needs to do when moving and having limbs vertical). It helps drain excess fluid from the feet and ankles if they tend to get swollen and some advocates say it’s good for lower back pain, insomnia and even menstrual issues for women.

Third Move: Legs up the wall. Viparita Karani is the Sanskrit name for legs up the wall.
Fourth Move
Arms and shoulders. You should not be surprised if you have shoulder tension. Your neck and shoulder area is where you carry the weight of your world. And most of us, by the time we reach adulthood have become patterned to have stress in that area of the body. Even if you work out, swim, use weights you will discover shoulder tension because that is the one area of the body that holds your stress. The fourth move in this sequence of yoga moves for everybody is staying where you are with your legs up the wall and then extend your arms back behind you to touch the floor or mat or mattress. Straighten your elbows and widen your fingers. If it’s too tight, take your hands out to the sides. If you have a lot of tension or tightness, put a pillow or block behind you so if your hands cannot reach the floor when they are outreached behind, you bring the floor up to reach you, you create a raised platform for the hands to find. And it can be super powerful to let your hands be suspended in the air, but for many people, if you are beginning, that can create more tension rather than help you relieve tension. And remember to get a balance when you touch the tension in your shoulders. You want to oscillate between finding a restriction (reaching out your hands, straitening your arms) and relaxing your shoulders and letting go of that restriction. This posture with your arms straight up and out behind you will show you very clearly where your tension is in the shoulders. So breath and relax around any tension you discover and watch it dissolve. Breath and let it go. If you practice yoga and you get all tight and strain and fight in the posture you are not getting the benefits of the practice. You are moving in the opposite directions from what Yoga is designed for. So remember to relax and wait and see how the body knows how to adjust.

Fourth move: Extend your arms behind you on the floor
Fifth Move
Neck: Once you have your legs up the wall and your arms, elbows and fingers extended out behind you turn your neck to the left for a couple of minutes and then come back to centre and turn your head to the right. This sequence of neck turns is to be done very slowly, mindfully and with care. You may carry some story in your neck, and so you need to allow yourself to feel safe. And in that safety you also want to turn enough to each side (while keeping your arms up behind you) that gives you a clear picture of your neck tension so you can release it. Even if you have a really tight neck (maybe only on one side) you can still find the movement to a millimetre. Don’t be disheartened by a small movement. Each degree is important. In fact some people in the neuroscience and movement field will tell you that a smaller movement is better. That you are in fact training the brain to understand and map the movement range in your neck and the brain needs tiny movements and full awareness and consciousness of those movements to be able to increase them
Fifth move: turn your neck to left and right then come back to centre
Sixth Move
Bring your arms by your side. Feel the circulation normalize. Depending on how long you keep them extended on the floor behind you, you may incur some numbness or loss of feeling in the hands, shoulders or arms. Remember that the posture itself does not create that numbness. It is the restriction in the shoulder that pre-exists that creates the numbness. You are just putting the shoulder in a position that is highlighting that restriction. You have heard of frozen shoulder. Well any tightness or tension in the shoulder is a precursor for having the shoulder freeze, it means stiffness, lightness and lack of circulation. As you place your arms back down by the sides of your body let yourself relax and feel the blood, lymph and other circulatory systems come back to neutral.
Then raise your right foot off the wall towards the right shoulder. Extend the back of the right knee and flex the right foot. Keep your hips and lower back evenly placed on the mat. Centre the heel of the left foot that remains on the wall (making sure the foot is aligned and not turning in or out to the sides). Make a small (very small) movement of the right leg so you turn the femur (thigh bone) in slightly to the left. This movement is tiny and just makes a very small adjustment in the hip socket. Keep the right leg fully extended up towards the ceiling, moving toward the right shoulder, opening up the back of the right knee and flexing the right foot strongly so the toes of the right foot are facing towards your belly or forehead. At the same time see if you can let the leg drop back into the hip socket by using gravity.
After a time (could be 30 seconds, one minute, five minutes or somewhere inbetween) change sides.
Do not be surprised if it feels different on left to right. When you explore these simple yoga moves for everybody you are probably going to find a difference between the left and right sides of your body. It’s normal.
Sixth move: lift each leg off the wall, keep it straight and flex the foot.
Seventh Move:
Now bend your knees to bring your legs off the wall onto your mat. Relax your whole body. With your legs extended out in front of you. Lie and breath and relax.
Seventh Move Final Relaxation.
And when you have finished this sequence, allow yourself to move more slowly and more mindfully as you go through your day and your life.
Click here to get the audio recording
Here’s a summary of the seven moves. If you want to take longer than the 15 minutes recording to do the sequence, you can print this off by clicking here
Summary page of SEVEN MOVES of YOGA FOR EVERYBODY
If you would like more recordings of full yoga classes to join Kathy White Yoga membership go here Kathy White Yoga Membership


Comments
Post a Comment